How to sign a document with fillable fields?
A guide for counter party who has received a document for signing which includes fillable fields.
Step 1. You get an email
Every invitation to sign is followed by an email with a direct link to the document. Press Review and sign to view the document.

Step 2. Accept invitation
Before proceeding with the process of signing and filling in fields you need to accept the invitation to sign. Press “Accept invitation”.

Step 3. Fill in fields
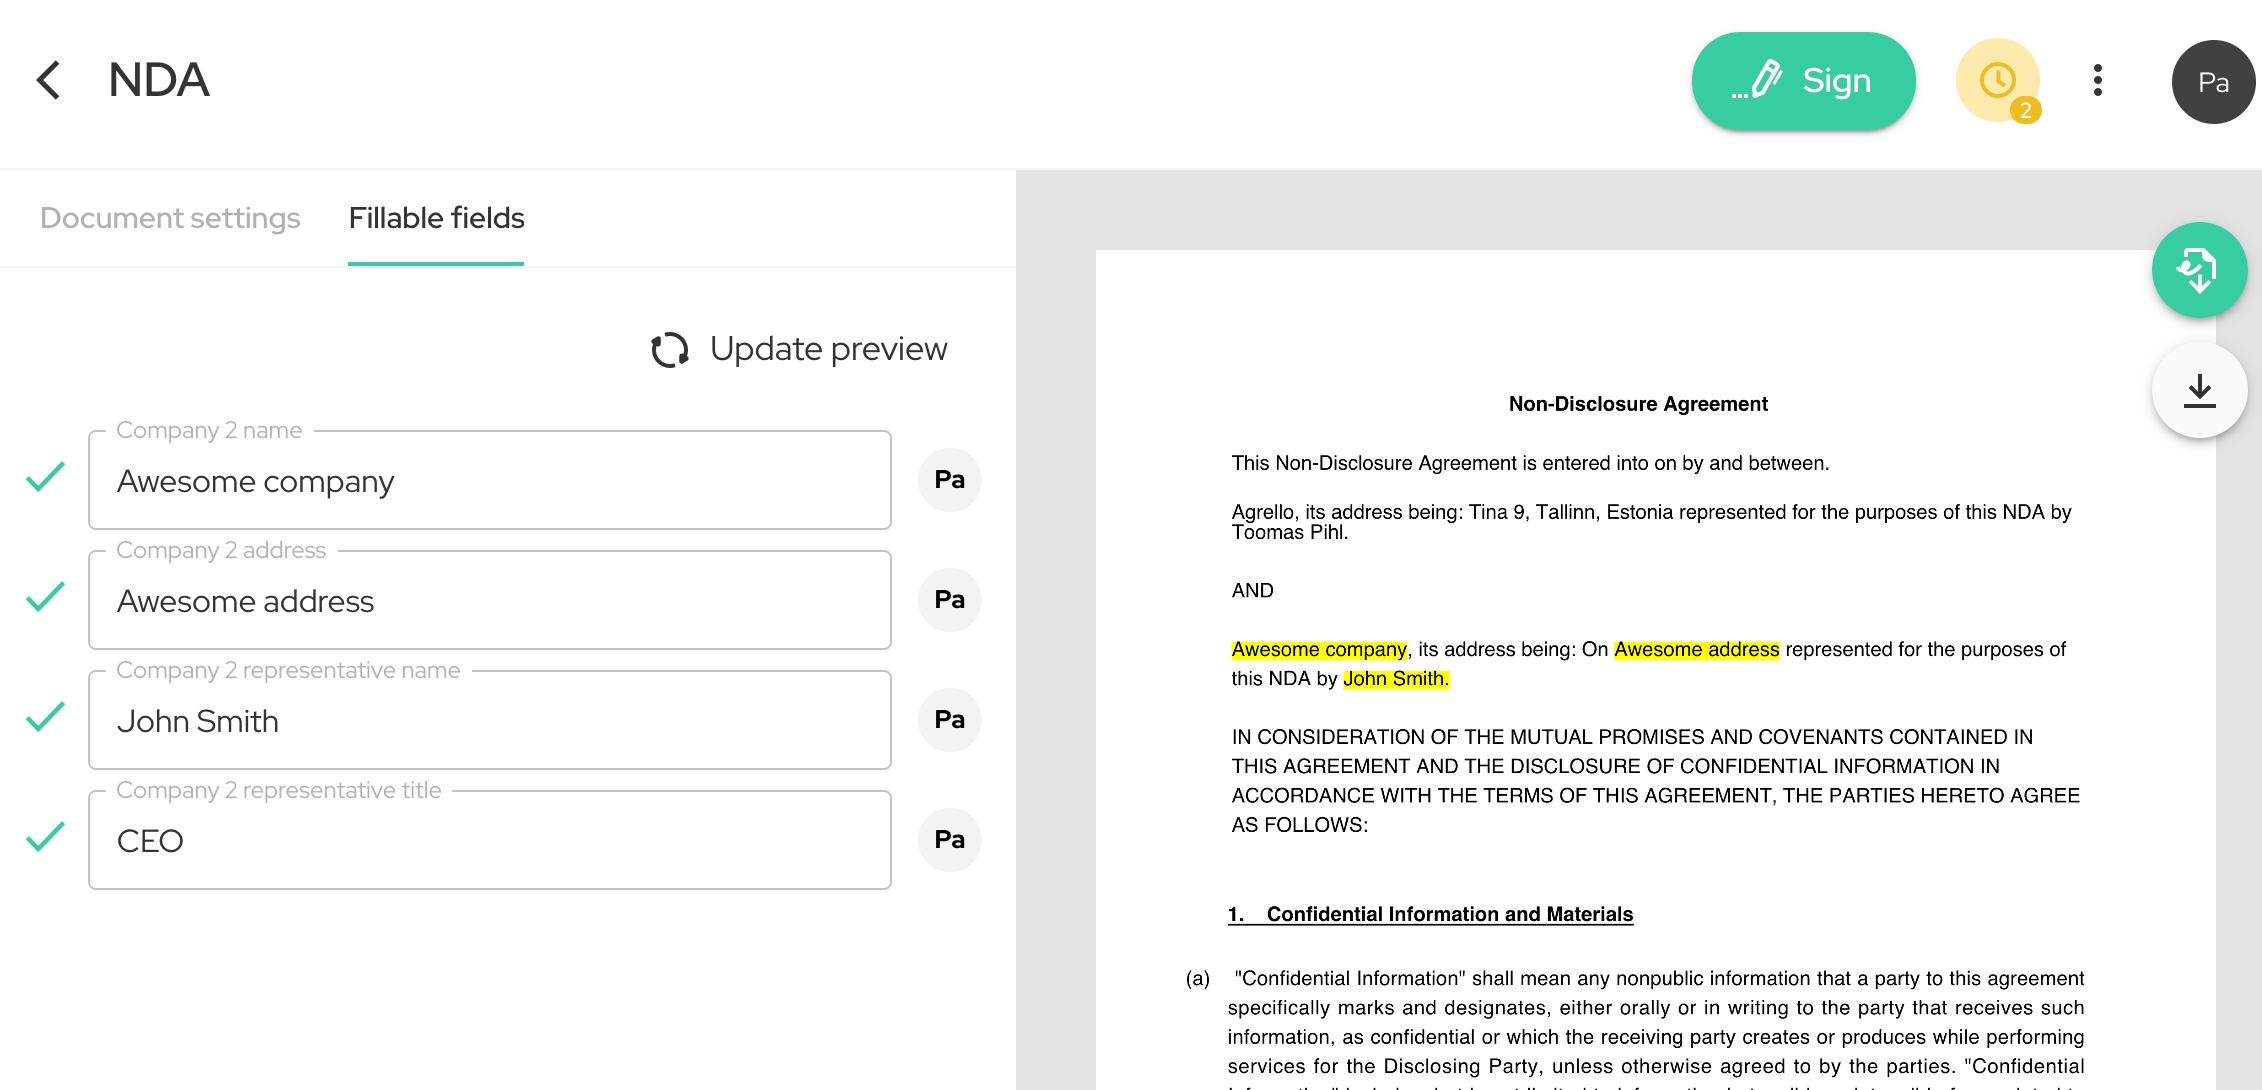
After accepting the invitation you will see Fillable fields menu next to Document settings. There is a yellow exclamation mark highlighting that there are fields that need to be filled.
Fields that have your name behind it are assigned to you for filling in.

Fill in the data and press Update preview to see how the content you filled in magically appears inside the document. See screenshot for highlighted fields. After all fields are filled the Sign button becomes active and you can proceed with signing the document.


Step 4. Sign document
After pressing Sign button a dialog will appear on the right. Press Sign document to confirm your signature. That’s it - all done! The document is signed.

Last updated
Was this helpful?